Fall Recipes: Boo-tiful and Delicious Dishes to Make With Friends
October 30, 2020
October 1st. The day that many eagerly await because that’s the first day where it’s considered socially acceptable to start celebrating Halloween. If there was any doubt it was fall, there definitely isn’t any now in October. With the arrival of pumpkin spice lattes and spooky decorations, it’s clear that it’s spooky season. However, with the pandemic, it’s harder to celebrate one of the most loved holidays in America.
As Jocelyn Acosta-Mendoza, ‘22, said, “It’s sad we have to be in quarantine for Halloween, but the spirit of Halloween will still live in us. This Halloween, unlock your inner demon by eating tons of candy and binging horror movies. But, most importantly, stay inside and stay safe.”
With that in mind, here are a few recipes to celebrate this spooky season while staying inside.
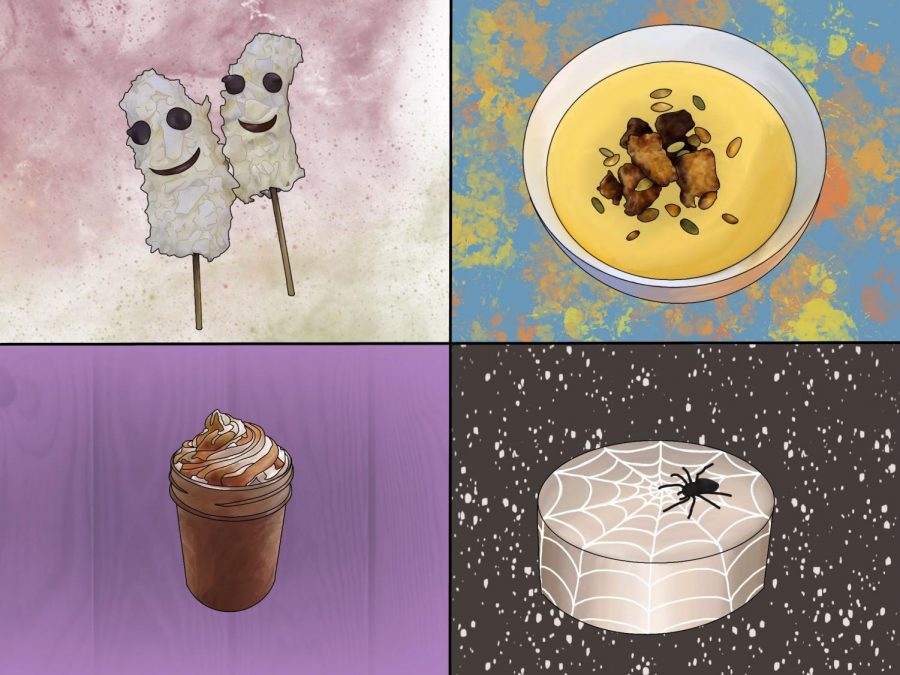
Frozen Banana Ghosts
Source: BBC Good Food
Description: These spooky ghosts are kid-friendly treats that barely take 15 minutes to prepare. Only four ingredients are needed to make this ice-cream-like treat.
Thoughts: This was the easiest recipe from this set by far. No baking or cooking experience is required to make this, and it can be easily customized. Don’t like coconut? They might lose a little texture, but you can still have spooky banana popsicles covered in just white chocolate. The facial features can also be customized since it isn’t required to use only dark chocolate to decorate. Try using other pieces of candy when making this recipe!
Would I Make This Again?: I would definitely make this again with friends. Personally, I didn’t enjoy the taste of the bananas, but my mother gave it two thumbs up. I can see it being a really fun activity that’s similar to arts and crafts since most of the fun comes from the decoration.
Ingredients:
- White chocolate
- Bananas [see recipe note 1]
- Shredded coconut
- Dark chocolate chips
Extra Equipment:
- Popsicle sticks
Method:
- Line a large baking sheet with parchment paper.
- Gently melt the white chocolate either in a microwave for 15 seconds at a time or in a heatsafe bowl over a pot of simmering water. Set aside. Place the shredded coconut into a separate bowl.
- Peel the bananas, cut in half, and push a popsicle stick into each piece.
- Using a pastry brush [see recipe note 2], coat the banana in the melted chocolate [see recipe note 3], letting the excess drip away. Sprinkle with coconut until coated [see recipe note 4].
- Using the dark chocolate chips, add two eyes and a mouth [see recipe note 5]. Additional features, such as eyebrows, may also be added using chocolate shavings.
- Freeze for at least 4 hours, ideally overnight. Keeps for up to a week.
Recipe Notes:
- Please do not use frozen bananas for this recipe. When I first tried making this recipe, I made the dire mistake of using frozen bananas. It was horrible. The bananas started melting instantly, causing all sorts of leakage. The chocolate would slide right off the bananas. After keeping it in the freezer for an hour, all the juices had leaked out, and the bananas were deflated. Use regular, non-frozen bananas.
- I used a pastry brush for a couple of the bananas, but I found that a regular spoon will work just as well. The main difference is that brushing the melted chocolate on will create a thinner layer.
- I left the bananas on the parchment paper and only covered half in chocolate since the banana kept sliding around on the stick.
- Once the chocolate was on the bananas, it started to set rather quickly. I found that pressing the coconut into the chocolate guaranteed more coconut stickage.
- My chocolate chips were too big for me to make snowman-like mouths on my bananas, so I melted some of the dark chocolate and traced the faces on.
Spiderweb Cake
Source: Food. (cake) and BBC Good Food
Description: This spooky Halloween showstopper is guaranteed to be a hit at any Halloween party. A rich devil’s food cake covered in swiss meringue buttercream and marshmallow spider webbing–a cake sure to impress.
Thoughts: This recipe was the most time intensive recipe out of all the recipes in this collection. This cake is mostly about the decorations, so the devil’s food cake can be substituted with a generic chocolate cake base and the swiss meringue buttercream with a normal buttercream. However, going the extra step to make all the components in this recipe will be worth it.
Would I Make This Again?: I might, although I would omit the decoration. While I thought the cake and frosting itself tasted good, the decoration was really underwhelming. It might’ve been because I was using vegan marshmallows, but I didn’t get a good enough stretch to create a cool webbed design on the cake. Additionally, after the marshmallow webbing cooled, it hardened and was horrible to eat. I would probably make the cake itself again, but not with the webbing. I would still recommend to give it a shot, especially since the overall appearance will still look good.
Ingredients:
Devil’s Food Cake:
- 2 cups all-purpose flour
- 1 teaspoon salt
- 1 teaspoon baking powder
- 2 teaspoons baking soda
- ¾ cup unsweetened cocoa powder
- 2 cups sugar
- 1 cup vegetable oil
- 1 cup hot coffee
- 1 cup milk
- 2 large eggs
- 1 teaspoon vanilla extract
Swiss Meringue Buttercream:
- 3 large egg whites [see recipe note 1]
- 1¼ cup sugar
- 1½ cup (3 sticks) + 2 tbsp unsalted butter (room temperature)
- 200 g white chocolate, melted and cooled
Decoration:
- 100 g white mini marshmallows
- 25 g black sugar paste [see recipe note 2]
Extra Equipment:
- Two 9” round cake pans
- Handmixer
- Offset spatula [see recipe note 3]
Method:
Devil’s Food Cake:
- Preheat oven to 325oF. Grease and flour 9” rounds and place a disk of parchment paper at the bottom of the pans.
- In a large mixing bowl, sift together all the dry ingredients. Whisk until thoroughly incorporated.
- Add oil, coffee and milk to the dry ingredients and mix at medium speed until incorporated. Add eggs and vanilla and beat for a couple of minutes. The batter will be very thin.
- Pour the batter into the 9” rounds and bake for about 30 minutes. (A toothpick inserted into the center of the cake should come out cleanly.) Cool the cakes in the pans for about 15 minutes before removing and cooling on racks.
- Make sure that cakes are completely cooled before frosting them. [see recipe note 4]
Buttercream:
- Put the egg whites and sugar in a heatproof bowl over a pan of simmering water. Stir continuously with a whisk until the sugar is dissolved and the mixture reaches 71oC (or 160oF).
- Remove the egg white mixture from heat and whisk on high speed until tripled in volume and cooled down.
- Slowly add butter 1 Tbsp. at a time to the egg white mixture while keeping the mixer on. The mixture should look glossy and thick. Add the melted white chocolate.
Assembly:
- Put one of the cake layers on a cake stand (or just a plate, but it will be harder). Spread a layer of buttercream on top of the cake layer and place the second layer on top. Spread the remaining buttercream all over the cake with the offset spatula. Chill until the buttercream is firm to the touch; this will take at least an hour.
- Melt the marshmallows in a heatproof bowl over a pan of simmering water while occasionally stirring. This will take quite some time, so be patient. Once melted, remove from heat and let cool slightly.
- Dip your fingers into the melted marshmallow and stretch to form long strands [see recipe note 5]. Dipping fingers into vegetable oil first will help the marshmallow from sticking to your hands. Drape the marshmallow strands in a random pattern over the cake.
- Create a spider with the sugar paste. Roll two balls, one bigger than the other, and eight thin strands for the legs. Place on top of cake.
Recipe Notes:
- There are two ways to separate egg yolks from egg whites. The first involves passing the egg yolk from eggshell to eggshell until the egg white has dropped out. This can break the egg yolk, since the edges of the egg shell are sharp. The way that I do it is by cracking the egg into the palm of my hand and allowing the egg whites to seep through my fingers, all while keeping the egg yolk cupped in my hand. I would google a video tutorial before trying it for the first time.
- I could not find any sugar paste in any store in my area, so I was not able to create the spider.
- An offset spatula makes it really easy to spread the icing, but a spoon will work just as well. Don’t expect a smooth finish though.
- I started making this cake late at night, so I froze the cakes overnight. This could make them easier to frost. This step is completely optional, but I would still recommend it.
- The way that I was able to stretch the strands without breaking them was by stretching small segments of each strand at a time, which is why my strands don’t look very uniform across the cake.
Pumpkin Soup
Source: BBC Good Food
Description: This seasonal squash soup is an easy, four-ingredient recipe that’s a perfect warm dish to complement the increasingly chilly weather.
Thoughts: This was the easiest dinner I have ever made. Even though the recipe is named “Pumpkin Soup,” any type of squash can be used. I used butternut squash when I was trying out this recipe. I hate butternut squash, but I thoroughly enjoyed this soup.
Would I Make This Again?: I would hands down make this recipe again. If I had to pick one recipe out of this set to recommend, I would choose this one in a heartbeat. It requires only basic cooking skills, tastes amazing, and lasts for up to two months in a freezer!
Makes: 4-6 servings
Ingredients:
Soup:
- 2 tbsp olive oil
- 2 onions, finely chopped
- 1 kg pumpkin (or any squash), peeled deseeded, and chopped into chunks [see recipe note 1]
- 3 cups vegetable stock or chicken stock [see recipe note 2]
- ⅔ cup heavy whipping cream
- Salt
- Pepper
Croutons:
- 2 tbsp olive oil
- 4 slices bread
- A handful of pumpkin seeds
Extra Equipment:
- Immersion blender (or a regular blender)
Method:
Soup:
- Heat the olive oil in a large saucepan, then gently cook the finely chopped onions over low heat. They should become soft enough to cut with very little pressure, but not have browned.
- Add the chunks of squash into the pan and cook on a medium heat, stirring occasionally until the squash starts to soften and turn golden (about 8-10 minutes). The idea is to gently roast the squash.
- Carefully pour the stock into the pan and season with salt and pepper to taste [see recipe note 3]. Bring to a boil, then reduce to a simmer until the squash is very soft
- Pour the heavy cream into the pan and bring the soup back to a boil. Use the immersion blender to puree the soup in the pot until smooth. [see recipe note 4]
- Taste the soup and adjust the seasoning. Serve with the croutons, seeds, and olive oil, if desired.
Croutons (Can be made a day in advance. Store in an airtight container):
- Cut the sliced bread into small squares
- Heat the olive oil in a shallow pan. Add the bread cubes into the pan and fry until crisp. Stir the bread occasionally.
- Add a handful of pumpkin seeds to the pan and cook until lightly toasted
Recipe Notes:
- I used frozen, pre-cut butternut squash in this recipe, and it worked just as well. Getting an entire fresh squash is not required for this recipe.
- Instead of using general stock that is found in bottles, I used bouillon cubes. I accidentally added twice the amount of cube that I was supposed to add. If you’re using bouillon cubes, I heavily recommend adding twice the amount of cube to the recipe. If not, don’t worry and just continue to season the rest of the soup to taste.
- I would recommend under-seasoning the soup at this step. I didn’t season the soup at all when I put the stock in, and I was still able to season it reasonably well when the soup was finished. Remember that seasoning can always be added, but it can never be taken out.
- I don’t have an immersion blender, so I used a regular blender and blended the soup in batches.
Pumpkin Butterbeer Hot Chocolate
Source: Half Baked Harvest
Description: Read the Harry Potter series and wished you could try butterbeer? What if that was hot chocolate? Since it’s almost Halloween, let’s throw in some pumpkin as well. This decadent hot chocolate is worth every sip.
Thoughts: When I first took a sip of this, I got 90% butterscotch-infused whipped cream. Naturally, my reaction was to put my cup down and tell my mother, “This is way too salty.” However, the second sip that I took was much better and well-balanced in terms of sweetness and saltiness. Although I could barely taste the pumpkin, I thought this drink was really good and doesn’t live up to its sugary-sounding name.
Would I Make This Again?: I probably would, but I would definitely scale down the recipe unless I was making it for a lot of people. The hot chocolate is very rich, so I couldn’t really drink too much of it at a time, and I still have a jug of the hot chocolate in my fridge.
Ingredients:
Hot Chocolate:
- 4½ cups whole milk
- ¼ cup cocoa powder
- 1 tsp ground cinnamon
- 6 oz milk chocolate chips
- ½ cup pumpkin puree
- ⅓ cup butterscotch sauce
- 1 tbsp vanilla extract
- 2 tbsp butter
Butterscotch Whipped Cream:
- 1 cup heavy whipping cream
- 2 tbsp butterscotch sauce
- 1 tsp vanilla extract
Butterscotch Sauce:
- ¼ cup (½ stick) unsalted butter
- ½ cup dark brown sugar (packed)
- 1 tsp kosher salt
- ½ cup heavy whipping cream
- 1 tsp vanilla extract
Extra Equipment:
- Piping bag with a star tip (optional)
Method:
Hot Chocolate:
- Add milk to a large, heavy bottomed pot
- Add the rest of the ingredients, and place the pot over medium low heat until the milk is scalding, but not burning. Stir the pot occasionally to make sure nothing sticks
Whipped Cream:
- Add cream to a large mixing bowl and whip until stiff peaks form. Add vanilla and continue to whip until combined
- Stir in the butterscotch sauce, leaving streaks in the whipped cream
- Store in fridge until ready to serve [see recipe note 1]
Butterscotch Sauce:
- Melt butter in a small pot.
- Add brown sugar, heavy whipping cream, and salt. Bring to a boil, and then reduce heat to medium and boil for about three to four minutes. [see recipe notes 2 and 3]
Recipe Notes:
- I tried to be fancy for the picture and put the whipped cream in a piping bag. This is not required. A spoon will work just as well.
- I don’t recommend tasting the sauce at this stage. Because there is the same amount of salt as vanilla, this recipe is insanely salty. It balances out in the drink, but tasting a spoonful of this was one of my top ten most horrible accidents in the kitchen.
- There will be extra sauce left over. I used some to drizzle on top of my whipped cream.
Overall, I had a really fun experience trying out all these recipes. I recommend giving every single one a shot to get a really spooky start to the festive season!


